Embrace the Camera

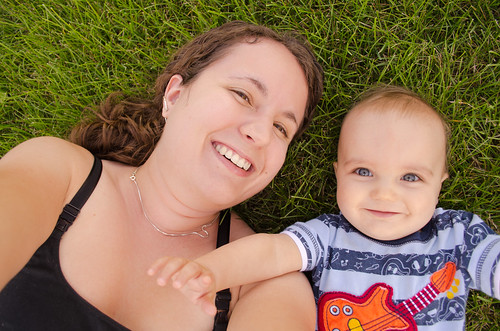
Last week, Jameson and I hung out outside for a little while before Brian came home, and I (of course) decided to take some photos. I got some great shots of Jameson, and then I had a crazy idea to try and take a self-portrait without the tripod.

The Nikon D5100 is a hefty thing, but I love the swivel screen. The screen comes all the way around so you can see yourself as you’re taking the photo; which meant that Jameson could see me smiling at him. What do you know, I got us both grinning and in focus by simply holding the camera above our heads!

Though I was a little unhappy with my appearance (it was after work you know), it really captured a cute moment of us. And it didn’t even require anyone else to take the photo!

Love this camera.

P.S. I’ve linked this post up with the anderson crew‘s Embrace the Camera link up. The idea of embrace the camera is to get out from behind the camera and get in the photo! I’ve noticed I stay behind a lot, trying to capture the moments instead of being a part of them. What a great idea!

Continue Reading

8 Months

Yesterday we did our usual monthly photo shoot. However, it was anything but usual. Suddenly, I couldn’t get a smile out of him! I couldn’t distract him from the blocks! Even a spare block wasn’t enough to deter him from the tasty looking 8 MONTHS blocks.

The photo shoot was a shambles. I took 238 photos, and after my first mass deletion I still had 111. And none of them really spoke to me the way they have in the past, except for a couple where he wasn’t smiling and there were no blocks.

I suppose I am the one making up my own rules though, so these were my favorite of the non-block photos. And I suppose in their way they reflect the way he really is at 8 months — moving, looking, touching, tasting. He was fascinated with his overalls too.


I moved the blocks to the foot rest to try and get them out of his reach.

And then there was this magic that happened. Right after I thought maybe I’d gotten one clear shot of him smiling with the blocks (I hadn’t), he became so determined to get at the blocks that he did some magic move that landed him on his knees for a minute. Is this the beginning of crawling? No? Maybe swimming?

I have always called this child a little lazy. He doesn’t roll except in his crib where are there bars to push off of. But apparently when there is something he really wants, he will find a way to get after it. I will need to start watching him closer!

And then, I confess, I cheated a bit and photoshopped some blocks in. It came out okay.

But this is really what the photo shoot was all about.

Continue Reading

5 Views of The Farm

I have three ways to get to work each day, but most days I take the highway. Off the highway, I pass a little rundown farm, old house, and a pond. I don’t think that anyone lives there, but I could be wrong. In the morning, the light hits it just so which makes me crave to have a camera in hand and time to stop.

It’s not often that I have the urge to take landscape photos, but yesterday morning I was inspired, and tried to take a photo in my moving car (which is never a good idea, but don’t worry nothing bad happened). Anyway, I ended up with one out of focus photo and another photo of the pond’s weeds on my phone. I thought, maybe I should try to use these anyway, and this inspiring post turned into something else entirely.

I don’t have an iPhone, and so I don’t have access to Instagram. However, I love the effects, particularly for photos taken on the phone — I love and process RAW images with Lightroom, but my phone photos are often ugly and unexciting.

I found this article  for web-based alternatives and tried a few out. I only wanted ones that I could add a border too, because that’s my preference. Here are my original photos:

Pixlr-O-Matic was nice in that you didn’t have to sign up, which I liked. I also enjoyed the many options but found it was actually a pain to sift through all of them. It had additional features beyond retro filters and borders, you could also pick an in between layer (to add sun spots like I did here or other options). However, there was no option to crop my photo that I found.

I tried Instant Retro, but this site ran really slow for me. Sorry, but I don’t have patience for that. It also was a little different in how you added borders or filters, giving you a little more flexibility but only if you know what you’re doing. The borders integrated textures though on the photo which I liked.

I did try the Photoshop action files, which of course were my favorite for processing but if you don’t have access to Photoshop you’re out of luck. Plus, the borders are not very exciting. You could add different ones, but again you’d have to know what you’re doing.

I think that PicYou was my favorite, even though there was only one border option. It was fast and easy to choose the filter! However, you do have to sign up. I ended up running both my photos through this one and was pretty happy with the results.

There’s nothing that beats a high quality photo from a high quality camera though. I guess one of these days I’ll have to get up early (I already get up at 5:45, I am not sure it will be possible!) and stop along the road.

On my way home I tried again and got these shots of the pond and the old house on the farm. The light isn’t the same in the evening, but still fun processing:

There are a few other places on my list that I’d love to photograph properly. There is a small cemetery near our old house with a wooden swing hanging from a branch that overlooks a hill. I have been wanting to go back there for a couple years with my camera. Also, on certain mornings, there is another cemetery that holds the early fog really well that would be lovely to photograph.

Good thing we’ve been talking about farms so far or you’d have thought I have a thing for cemeteries. Which I do.

P.S. See you Monday everyone! This weekend we are hoping to head to the zoo again, and celebrate Brian’s mom’s birthday.

Continue Reading

In Bloom

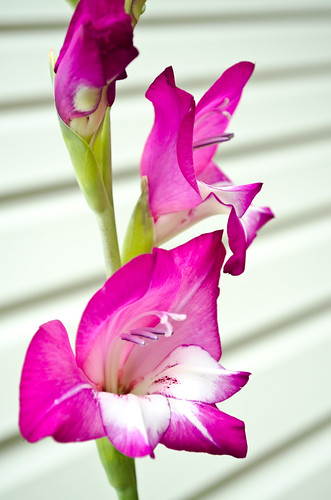
For the past couple weeks, my gladiola bulbs finally started blooming! Two weeks ago I shared the budded bulbs (and the discovery of the pumpkin plant in my flower bed) but since then they have exploded in an array of colors I had to share. Please forgive me, I couldn’t narrow the photos down, so here are all my favorites!

Along the side up to the porch and the back center flower garden I planted plumtart gladiolas, which are all a smaller bright purple flower. I’ve been clipping them for display inside; they are gorgeous and the perfect size for a tall skinny bud vase.

The rest of the gladiolas on the corners of the house are very large and in mixed colors, and they finally bloomed this past week in reds, deep purples, pink and multi.

This one  above is my favorite, I’m showing it off at and then, she {snapped}!

The pictures are so gorgeous, I almost felt like they could be a painting. I tried a couple textures out to see. I may have to get this printed on canvas, from the Groupon I purchased a couple months ago which I haven’t decided what to use on yet.

And the bokeh! Those lovely out of focus circle elements in the background. I can see why some photographers might dedicate their work to this style photography.

I have clipped one of these large stems for the house, and spent some time figuring out where to place it. I’ve settled on the entryway, because it needs to lean against a wall.

These blooms are completely worth the trouble of digging them up for winter storage. Sadly, I don’t think I will get to see the lilies, dahlias, or freesia bloom this year. The plants are big but without buds this season. We’ll have to wait for next year on those.

Continue Reading

Digital Scrapbook: Sneak Peak!

Today, I have finally started working on Jameson’s scrapbook. It’s a digital scrapbook and it’s gonna be huge. But no bigger than 60 pages (30 front/back), because that’s what the book I’m making allows. Or… maybe I’ll just make two? We’ll see how it goes.

So far I have done birth, family introductions, Christmas, Jameson’s photo shoot, one week, and his first bath and walk!

Last names were removed in the layouts for privacy reasons, but the images are all true to what it will look like once printed. I’m pretty pleased with how its turning out, though I am not sure where I will find the time to catch up to where I should be.

Next up:

  • Jameson’s weekly photo shoots, which I did until he was 10 weeks old. I think I’ll roll that into 2 pages
  • Jameson’s monthly photo shoot, 1 page for each month
  • Great-grandpa’s 90th birthday party… and more!

Today, Jameson went to daycare while I had off work so that I could work on this without interruption. We did pick him up early, and then his Aunt Melissa came to babysit him while Brian and I went with the neighbors for dinner at Great Lakes Brewery in Cleveland. It was a hike, but so worth it. I had their butternut squash ravioli, and since we were at a brewery, I had some beer as well. I hear that some beer increases milk supply…? haha.

If I have time over this holiday weekend I’ll continue working on the scrapbook but the blog will be on a short hiatus until Tuesday. Don’t worry though, I’ll have some good stuff lined up for next week! Have a great 4th of July everyone.
Continue Reading

Photobook Follow up: Review of Paper Coterie

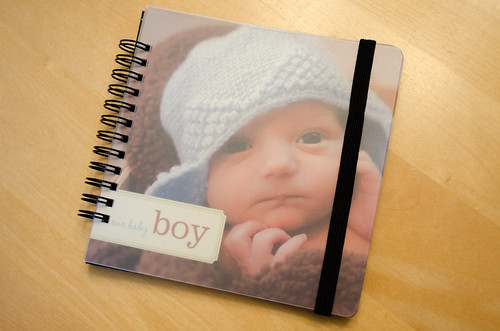
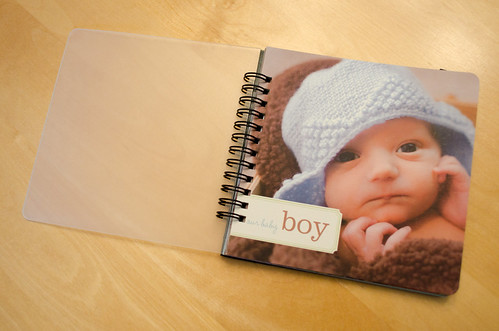
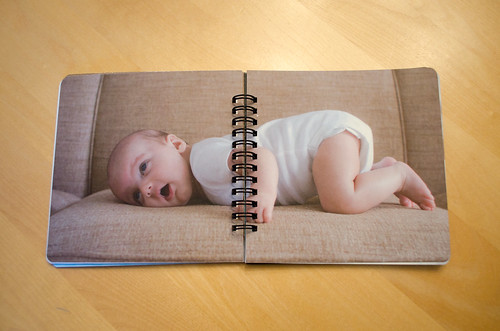
A short time ago, I wrote about trying out a new place to publish photo books. I purchased a 5″x5″ coil bound book from Paper Coterie which I finally received about a week and a half ago. Initially I was pleased with it. It has a very unique look with the paper they use. It is recycled fiber paper, and it is pretty stiff. It makes a nice matte look to the photos.

front of photobook
nice frosted plastic cover
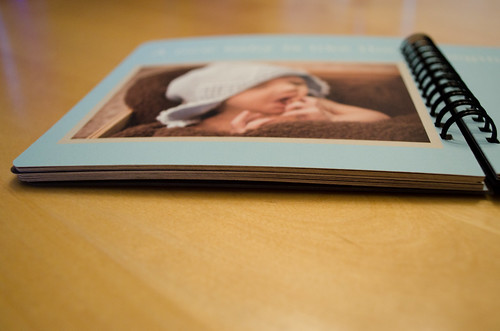
easy 2 page spread
lovely recycled fiber paper

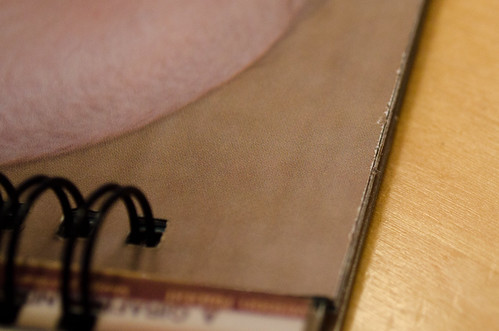
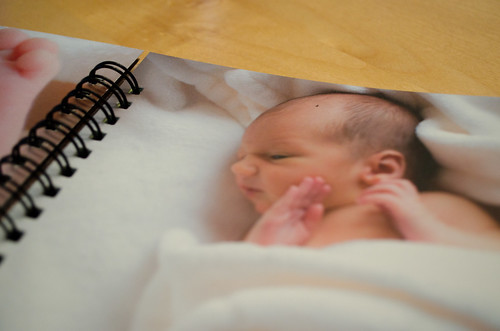
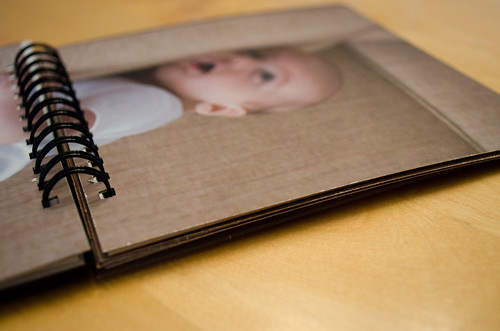
However, after having it a couple days and having the uniqueness of it wear off, I am quite sure I wouldn’t pay full price for these books. Remember, I only paid for shipping, so this was definitely worth the trial run. For one, you can see where the cuts have been made on the paper at the top, they’re a touch frayed. For another, I have ink speckles throughout my pages, which lends itself to a classic, old fashioned look but not my cup of tea, so to speak.

not so nice cutting... this is also a good close up of the paper quality though
another look at the poor cutting on top
the cutting on the bottom of the book is perfect
odd speckle on Jameson's poor forehead
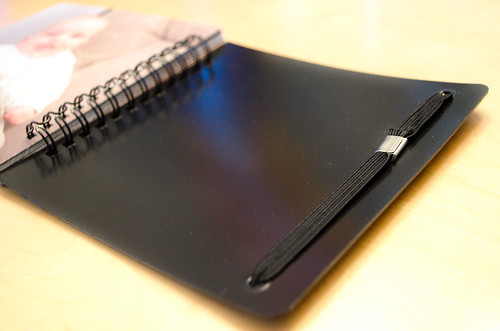
raw edge of elastic showing on the back (ignore my dust speckles, the back cover is nice quality plastic)

Remember, I purchased two of the same photobook. My second photobook had similar defects. In the second photobook, the frayed edges were on the side and a little less noticeable. The clasp of the elastic in the back was much nicer too – the raw edge did not show. Speckles were there, but not on Jameson’s forehead 🙂 The difference in quality is significant enough though that I wonder if one of my photobooks came from a poor run? Regardless, inconsistent quality is not a good sign.

I would like to add that their use of facebook is entertaining and clever. Their motto is capturing moments, and their photos are cute. Customer service seems wonderful. Definitely unique and easy to use. I would keep them in mind for their other products, the calendars and growth charts, which would be absolutely stunning in this style paper, but not quite up to my standards for photo books.

Continue Reading

Grass Face

For a while now I’ve been telling everyone that I can’t wait for Jameson to sit on his own so I can plop him in the grass and take lots of photos. I’ve been dying to take cute grass photos.

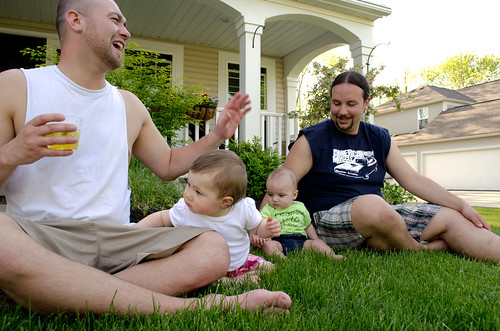
Well, we finally did put him in the grass even though he can’t sit on his own. The neighbors stopped by on Sunday and we had a classy impromptu photo shoot.

However, Jameson did not have the grinning, excited face I was hoping for… in fact, I think he was a little concerned about the grass… most of our pictures turned out with a concentrating face, concerned face, or crying. I deleted those last ones, haha.

Oh well. We’ll try again soon.

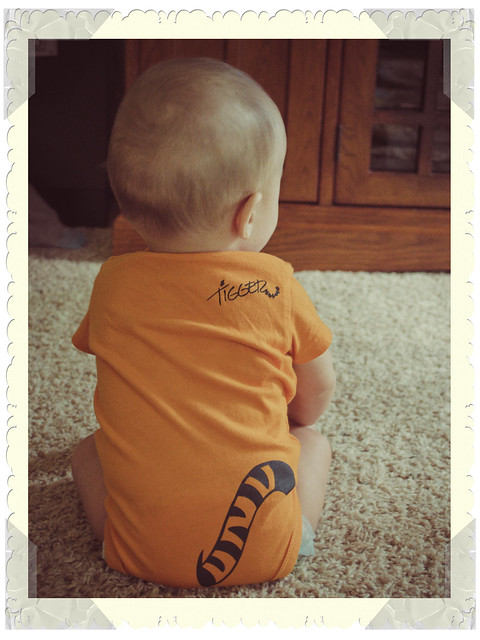
By the way, his onesie says “Peapod v 1.0 just out of beta”. We are nerds, after all. My friend Emma had it custom made for us when Jameson was born, and he finally fits in it. So cute!

Continue Reading

Digital Scrapbooking: The Hows, Whys and Wherefores

I’ve mentioned a few times that I am planning a digital scrapbook of Jameson’s first year. I used to “regular” scrapbook (regular? hardcopy? real?) but anyway, I just… lost interest. I burned myself out when I made a birth to 18 years scrapbook for my brother’s graduation, even with some help from my cousin. I have two scrapbooks that are started and will probably remain unfinished.

So why digital scrapbooking when I could just slap some photos into a photobook and call it done?

  • I always loved the look of scrapbooks, they’re so charming
  • I feel like it lends more meaning to the photos when you spend more time on it after you take them
  • Descriptions are beautiful rather than informational (a date can be done in digital chipboard to really pop and stand out, rather than just being a caption below the photo)
  • A chance to be creative! of course.

Digital scrapbooking seems pretty simple. You only need some basic Photoshop or other graphic program skills. Oh, and some photos.

  1. Get a program. You can go free, like GIMP. Or you can go expensive like full Photoshop CS. Or land somewhere in the middle with Corel Paintshop Pro or Photoshop Elements. Key here is the ability to work in layers so you can easily move around your photos “on top” of digital paper or other fun digital pieces.
  2. Get some digital paper, or make your own. Because I’m not about to make my own digital scrapbook paper, stickers or alphabets, I browsed around and found some free stuff. Searching “free digital scrapbook paper” will pop up all kinds of stuff. When we say digital paper, we really just mean images that look like paper.
  3. Get some fun fonts. Again, searching “free fonts” should give you call kinds of inspiration.
  4. Take a little tutorial on your graphics program of choice, once you understand layers and what dimensions your program is in (inches or pixels–it’s probably easier to work in inches while you do your scrapbook) you should be good to go!
  5. Once you’ve got a handle on the program, make a decision about what size you want your digital scrapbook to be. Most digital papers come square, so 12x12in or 10x10in are good sizes. You can get these printed individually as sheets (see some options here and here) or in a photobook (see my photobook post).
  6. Make your first page. Create a new image in your size, ie., 12x12in. Select your paper and place it on layer 1. Then you want to bring in your photos in other layers. You can resize your photos to fit your pages. Add some text in a fun font.
  7. Is this too boring? You can find other elements for your pages too. If you were searching digital papers, you probably saw all kinds of other things to add to your pages. Faux flowers, “stickers”, chipboard shapes, edges… Again you can get a lot of great stuff for free.

Here are a few of my favorite sites. One in particular is running a sale right now, I love their stuff. They are not free, but to me they have great quality, and remember the nice thing about digital scrapbooking is that everything can be used over and over and over.

So here I am, after all that research and accumulation of digital scrapbooking paper and elements, 5 months in and nothing to show for it. Time is flying! Time to get started…

Continue Reading

Practice Your Photo-Taking Skills on the Computer

I found this great SLR camera simulator to help practice with manual modes on the camera.

I confess that when I take photos I let the camera do all the work — I set my camera to automatic-no flash. With my new camera on the way, I’d love to learn the value of using aperture/shutter priority and manual modes!

When I was in high school, I used a traditional SLR camera. It’s so easy to be lazy with newer DSLRs. I learned my dad’s SLR camera and took a lot of great photos on it and promptly forgot them all by the time I had my DSLR. It’s time to re-learn.

Continue Reading